In the realm of diabetes management, where meticulous monitoring of blood sugar levels is paramount, the glucose meter stands as an indispensable ally. This compact, handheld device has revolutionized the way individuals with diabetes track their glucose levels, offering a convenient and immediate means of assessment. Unlike the complex laboratory tests of the past, glucose meters empower patients to take control of their health in real – time, making informed decisions about diet, exercise, and medication adjustments. From its humble beginnings to the advanced technology of today, the glucose meter has become a cornerstone of daily life for millions of diabetics worldwide, bridging the gap between medical expertise and personal health management.
The Fundamental Principle of Glucose Meters
At the heart of every glucose meter lies a sophisticated yet straightforward scientific principle. Glucose meters operate on the basis of electrochemical or optical reactions that detect the presence and quantity of glucose in a blood sample.
Electrochemical Glucose Meters
The majority of glucose meters on the market today are electrochemical. These meters work by using test strips that contain enzymes, most commonly glucose oxidase or glucose dehydrogenase. When a drop of blood is applied to the test strip, the enzyme in the strip reacts with the glucose in the blood. In the case of glucose oxidase, this reaction produces gluconic acid and hydrogen peroxide. The meter then measures the electrical current generated by the oxidation of hydrogen peroxide, which is directly proportional to the amount of glucose present in the blood sample. This electrical signal is processed by the meter’s internal microchip, which converts it into a readable glucose concentration value displayed on the meter’s screen.
Optical Glucose Meters
Optical glucose meters, although less common, also play a significant role in blood glucose monitoring. These meters rely on the absorption or reflection of light by substances in the blood sample on the test strip. After the blood is applied to the strip, a chemical reaction occurs that changes the color of the strip depending on the glucose concentration. The meter then shines a light through or onto the strip and measures the intensity of the transmitted or reflected light. Based on pre – calibrated algorithms, the meter converts the light measurement into a glucose level reading.
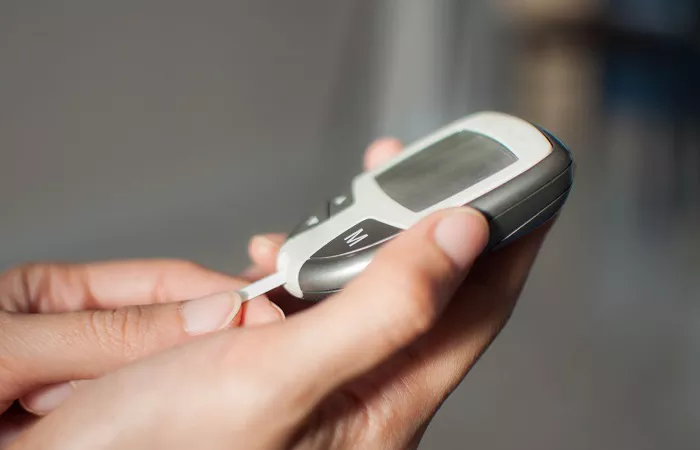
Types of Glucose Meters
The market offers a diverse range of glucose meters, each designed to meet different user needs and preferences.
Basic Manual Glucose Meters
Basic manual glucose meters are the most straightforward and often the most affordable option. These meters require users to manually insert the test strip into the meter, apply the blood sample, and then wait for the reading. They typically have a simple display and limited memory capacity, storing only a few recent readings. Despite their simplicity, they are highly reliable and suitable for individuals who prefer a no – frills approach to blood glucose monitoring or those on a tight budget.
Semi – Automatic Glucose Meters
Semi – automatic glucose meters offer some additional features compared to basic manual models. They may have an automatic strip ejection mechanism, which reduces the risk of contamination and makes the testing process more convenient. Many semi – automatic meters also have a larger memory capacity, allowing users to store dozens or even hundreds of readings. Some models can calculate average glucose levels over a specific period, which is useful for tracking long – term trends.
Advanced Digital Glucose Meters
Advanced digital glucose meters represent the cutting edge of glucose monitoring technology. These devices often come with features such as Bluetooth connectivity, enabling seamless data transfer to smartphones or other devices. They can integrate with dedicated health apps, which can analyze the data, generate detailed reports, and even provide personalized advice based on the user’s glucose patterns. Some advanced meters also have voice – activated functions, making them accessible to individuals with visual impairments. Additionally, they may offer features like multi – site testing, allowing users to obtain blood samples from areas other than the fingertips, such as the forearm or palm.
The Step – by – Step Process of Using a Glucose Meter
Using a glucose meter correctly is essential for obtaining accurate results.
Preparation
First, gather all the necessary supplies, including the glucose meter, test strips, lancets, and a clean cotton ball or tissue. Wash your hands thoroughly with warm water and soap, as dirty hands can contaminate the blood sample and lead to inaccurate readings. Dry your hands completely, especially the fingertips, as moisture can affect the test strip’s performance.
Lancet and Blood Sample Collection
Insert a lancet into the lancing device, following the manufacturer’s instructions. Choose the appropriate finger for pricking, usually the side of the fingertip, as it has fewer nerve endings and is less painful. Press the lancing device firmly against the skin and activate it to obtain a small drop of blood. Avoid squeezing the finger too hard, as this can introduce interstitial fluid into the sample, diluting the blood and potentially affecting the accuracy of the reading.
Test Strip Insertion and Blood Application
Insert a test strip into the glucose meter. Most meters will indicate when the strip is properly inserted. Then, gently touch the edge of the test strip to the drop of blood. The strip will usually draw the blood in through capillary action. Make sure the required amount of blood is applied to the strip, as insufficient blood can result in an error message or an inaccurate reading.
Reading and Record – Keeping
After applying the blood, the meter will start processing the sample. Wait for the specified time, usually a few seconds to a minute, depending on the meter model, for the reading to appear on the screen. Once the reading is displayed, record the result, along with the time and any relevant information such as the type of meal eaten or the activity performed before the test. This detailed record – keeping is crucial for tracking blood sugar trends over time and for sharing information with healthcare providers.
Ensuring Accuracy and Maintenance
To ensure the reliability of glucose meter readings, proper maintenance and quality control are necessary.
Calibration
Regular calibration of the glucose meter is essential. Calibration involves comparing the meter’s readings with a known standard solution to ensure accuracy. Some meters come with calibration strips, while others may require calibration through the meter’s settings or in conjunction with a calibration device. It is important to follow the manufacturer’s calibration schedule, usually when a new box of test strips is opened or if the meter has been dropped or exposed to extreme temperatures.
Test Strip Storage
Test strips are sensitive to environmental factors such as humidity, temperature, and light. Store test strips in their original container, tightly closed, in a cool, dry place. Avoid exposing them to direct sunlight or heat. Do not use expired test strips, as they may produce inaccurate results.
Meter Cleaning
Clean the glucose meter regularly to remove any blood residue or dirt. Use a soft, dry cloth or a cloth slightly dampened with water to wipe the exterior of the meter. Avoid using harsh chemicals or solvents, as they can damage the meter. Some meters may have specific cleaning procedures for the test strip slot, which should be followed to prevent clogs and ensure proper strip insertion.
The Role of Glucose Meters in Diabetes Management
Glucose meters are not just devices for measuring blood sugar; they are integral to comprehensive diabetes management. By providing immediate feedback on blood glucose levels, they allow individuals to make real – time adjustments to their diet, exercise, and medication. For example, if a reading shows high blood sugar after a meal, the user can decide to increase their physical activity or adjust their insulin dosage for the next meal. Regular monitoring with a glucose meter also helps healthcare providers assess the effectiveness of treatment plans and make necessary adjustments to optimize blood sugar control. In essence, the glucose meter serves as a constant companion, guiding diabetics towards better health and well – being.
Conclusion
The glucose meter has transformed the landscape of diabetes management, offering a practical, accessible, and accurate way to monitor blood sugar levels. With its diverse range of types, based on different operating principles, and its crucial role in daily self – monitoring, it has become an essential tool for individuals with diabetes. By understanding how to use a glucose meter correctly, maintain its accuracy, and interpret the readings, diabetics can take an active role in managing their condition and leading healthier lives. As technology continues to evolve, glucose meters will likely become even more advanced, further enhancing the quality of life for those living with diabetes.