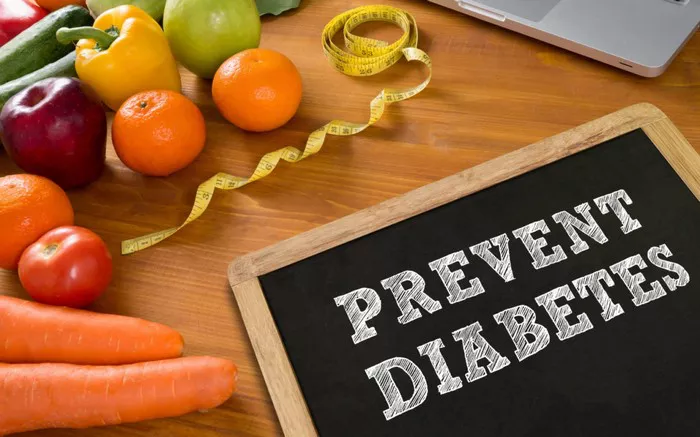
Blood sugar testing is a vital part of managing diabetes. For people with diabetes, knowing when and how to test blood sugar levels can make the difference between stability and complications. Regular testing helps you avoid highs and lows, track the effects of food and activity, and adjust medications. This article will help you understand the best times to test, how to do it, and what the results mean for your health.
If you are newly diagnosed or have been living with diabetes for years, regular blood sugar monitoring is the cornerstone of successful diabetes management.
What Is Blood Sugar Monitoring?
Blood sugar monitoring is the process of checking the level of glucose in your bloodstream. People with type 1, type 2, or gestational diabetes need to monitor their blood sugar to keep it within a healthy range. Monitoring helps prevent dangerous highs (hyperglycemia) and lows (hypoglycemia).
The readings help you understand how meals, medications, physical activity, and stress impact your body. Blood sugar monitoring provides real-time feedback that helps guide treatment decisions.
Why Checking Blood Sugar Is Essential
Testing your blood sugar tells you how well your treatment plan is working. It shows whether your diet, medications, and exercise are helping or need adjustment. Here are some key reasons to monitor blood sugar:
- To avoid complications such as nerve damage, kidney disease, and vision problems.
- To make day-to-day decisions about food, insulin, and activity.
- To reduce the risk of emergency situations like severe hypoglycemia or diabetic ketoacidosis.
- To see the impact of your diabetic diet on your body.
When to Check Your Blood Sugar
The timing of your tests depends on the type of diabetes you have, your medications, and your daily schedule. Below are the most common times for checking blood glucose.
1. Fasting (Before Breakfast)
This is usually the first test of the day. It tells you how your body regulates sugar overnight. Normal fasting blood sugar is typically between 70–100 mg/dL for non-diabetics and 80–130 mg/dL for most people with diabetes.
2. Before Meals
Checking before eating helps determine how much insulin or other medication you may need. It also provides a baseline to compare your post-meal readings.
3. One to Two Hours After Meals
Testing 1–2 hours after eating shows how your body is responding to food. It helps measure how high your sugar level rises after meals. Ideally, your blood sugar should be below 180 mg/dL two hours after eating.
4. At Bedtime
A bedtime test helps prevent overnight lows. If your blood sugar is too low at night, it may drop dangerously during sleep. If it’s too high, it may rise even more by morning.
5. During the Night (2 a.m. to 4 a.m.)
This test is not always required, but it can help detect overnight lows, especially if you use insulin or have experienced morning highs that suggest a rebound effect.
6. Before and After Physical Activity
Exercise can cause drops in blood sugar, particularly for people using insulin. Testing before and after activity helps you know if you need a snack to avoid a low.
7. When You Feel Symptoms
If you feel dizzy, shaky, sweaty, or confused, check your blood sugar. These are signs of low blood glucose. If you feel very tired, thirsty, or are urinating frequently, you may be high.
8. When Sick or Stressed
Illness and stress can raise blood sugar. During these times, you may need to test more often—every 2 to 4 hours. Always follow your doctor’s guidance when sick.
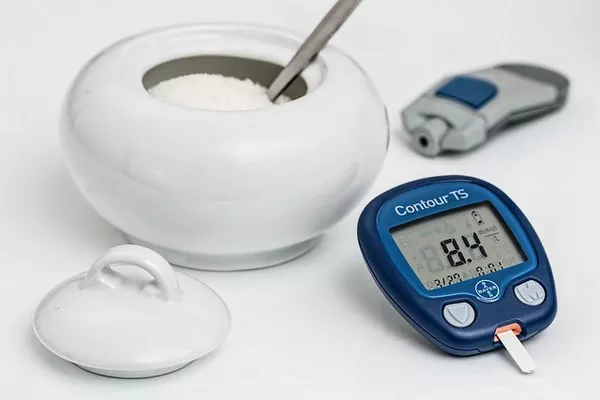
How to Check Your Blood Sugar: Step-by-Step
1. Gather Your Supplies
You will need:
- Glucose meter
- Lancet and lancet device
- Test strips
- Alcohol swab or warm water
- Logbook or mobile app (optional)
2. Wash Your Hands
Use warm water and soap to clean your hands. Dry completely. This step ensures an accurate reading. Food or lotion residue can affect the result.
3. Prepare the Lancet Device
Insert a new lancet into your lancing device. Adjust the depth setting to a comfortable level, especially if you have sensitive fingers.
4. Insert Test Strip
Turn on your glucose meter and insert a test strip as directed by the device manual.
5. Prick Your Finger
Choose the side of your fingertip rather than the center. Press the device and create a small drop of blood.
6. Apply Blood to the Strip
Touch the drop of blood to the strip’s edge. Your meter will usually beep or show a signal when it has enough blood.
7. Read and Record Your Result
The number will appear on the screen after a few seconds. Record it along with the time and other relevant details like food, exercise, or medication.
Interpreting Your Results
Fasting Blood Sugar
- Normal: 70–100 mg/dL
- Goal for diabetics: 80–130 mg/dL
Post-Meal (1–2 Hours After Eating)
- Goal: Less than 180 mg/dL
Bedtime
- Goal: 100–140 mg/dL (varies by individual)
If your results are consistently outside your target range, speak with your doctor. You may need to adjust your diet, activity level, or medications.
Tips for Accurate Blood Sugar Testing
1. Use Fresh Test Strips
Expired strips can give false readings. Always check the date and store them in a cool, dry place.
2. Rotate Finger Sites
Using the same finger repeatedly can cause soreness. Rotate fingers and avoid the center of the pad.
3. Avoid Squeezing Too Hard
If blood doesn’t come out easily, let your hand hang down or massage it gently. Too much pressure can dilute your sample.
4. Keep a Log
Write down your results or use a mobile app. Include notes about meals, exercise, medications, and stress. This will help you and your doctor identify patterns.
Continuous Glucose Monitoring (CGM)
CGMs are wearable devices that measure glucose levels throughout the day and night. They are especially helpful for people with type 1 diabetes or those who experience frequent highs and lows. Some CGMs require fingerstick calibration; others are factory-calibrated.
A CGM helps identify trends and alert you when your sugar is too high or low. Some models can connect to a smartphone for real-time tracking.
How Often Should You Check?
There is no one-size-fits-all answer. Frequency depends on your treatment plan. Below are general guidelines:
Type 1 Diabetes
- Before meals
- Two hours after meals
- At bedtime
- Sometimes overnight
- Before and after exercise
Type 2 Diabetes (on insulin)
- 2–4 times per day
Type 2 Diabetes (not on insulin)
- Often 1–2 times per day, or a few times a week depending on control
Gestational Diabetes
- Fasting
- 1–2 hours after meals
Discuss your testing schedule with your healthcare provider. Your needs may change over time based on health goals and medications.
Link Between Blood Sugar and Lifestyle
Testing blood sugar is not just about numbers. It helps you learn how food, stress, and movement impact your body. If you notice high readings after meals, you might need to adjust your diabetic diet. If you see morning highs, your medication schedule might need a change.
Blood sugar monitoring gives you the feedback you need to take control of your health every day.
Conclusion: Making Blood Sugar Checks a Habit
Regular testing is one of the most effective ways to manage diabetes. Knowing how and when to check your blood sugar empowers you to make informed choices about meals, medications, and activity.
Make testing a routine part of your day. Keep your meter and supplies in a convenient place. Set reminders if needed. The more consistent you are, the better control you’ll have over your diabetes.
Remember, testing is not just about numbers. It’s about living well, staying safe, and enjoying your life while managing diabetes.
Related topics:
What Is Considered a Fasting Blood Sugar?