Monitoring blood sugar is essential for managing diabetes. Regular testing helps you understand how food, exercise, medication, and illness affect your blood glucose levels. This is true for both type 1 and type 2 diabetic patients. A blood sugar test kit allows you to check your glucose levels from home. It provides fast and reliable results. Learning how to use the test kit correctly helps you stay in control of your health.
What Is a Blood Sugar Test Kit?
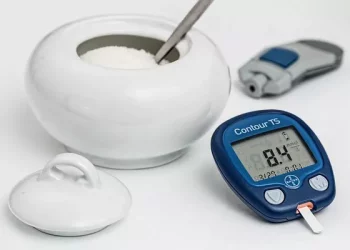
A blood sugar test kit is a small, portable device used to measure the amount of glucose in your blood. The main components include a glucose meter, lancets, test strips, and sometimes alcohol swabs. Some kits also include a lancing device, which holds the lancet and makes it easier to draw a small drop of blood. Glucose meters give readings in either milligrams per deciliter (mg/dL) or millimoles per liter (mmol/L), depending on your country.
When Should You Check Your Blood Sugar?
How often you test depends on your type of diabetes, your treatment plan, and your doctor’s advice. Common times to test include:
- Before meals
- Two hours after meals
- Before bedtime
- When feeling symptoms of low or high blood sugar
- Before and after exercise
- When changing medication or diet
Regular blood sugar monitoring helps you track your glucose trends over time. It also helps you make informed decisions about food and medication.
Preparing to Use Your Blood Sugar Test Kit
1. Wash Your Hands
Start by washing your hands with warm water and soap. This removes dirt and food particles that may affect the reading. Warm water also increases blood flow to your fingers, which makes it easier to get a drop of blood.
2. Gather Your Supplies
You will need the following:
- Glucose meter
- Test strip (one per test)
- Lancet and lancing device
- Alcohol swab (optional)
- Logbook or mobile app to record results
Check that your test strips are not expired. Expired strips may give inaccurate readings.
How to Use the Blood Sugar Test Kit: Step-by-Step Guide
Step 1: Insert the Test Strip
Turn on your glucose meter. Insert a new test strip into the slot. Most meters will power on automatically when a strip is inserted. Wait for the screen to show that it’s ready for a blood sample.
Step 2: Prepare the Lancing Device
Load a fresh lancet into the lancing device. Set the device to a comfortable depth. A lower setting may work well for most people. For thicker skin, a higher setting may be necessary. Avoid reusing lancets, as they can become dull and painful.
Step 3: Choose a Puncture Site
Use the sides of your fingertips. They have fewer nerve endings than the pads, which makes them less painful. Rotate fingers regularly to avoid scarring and soreness. Some meters allow testing from alternate sites, like the forearm or palm, but fingertip readings are most accurate during rapid blood sugar changes.
Step 4: Clean and Dry the Area
If you choose to use an alcohol swab, let the area dry completely. Alcohol residue can dilute the blood sample and affect your result.
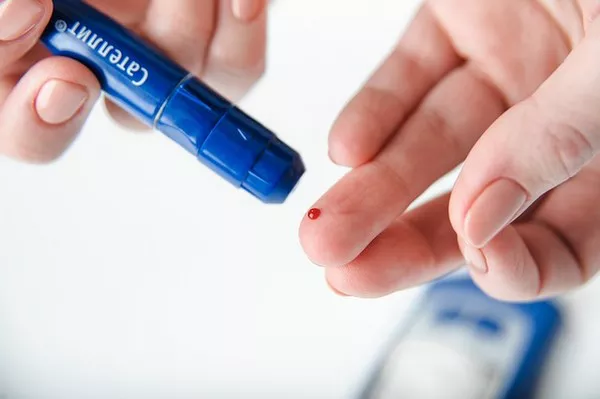
Step 5: Lance Your Finger
Place the lancing device against the side of your fingertip and press the release button. This creates a small puncture. Gently squeeze or massage your finger to produce a drop of blood.
Step 6: Apply Blood to the Test Strip
Touch the drop of blood to the edge of the test strip. The meter will draw the blood in. You only need a small amount. The meter will begin analyzing the sample immediately.
Step 7: Wait for the Result
Most meters take 5 to 10 seconds to display the result. Your glucose level will appear on the screen. Record the result in your logbook or app, along with the time and any relevant notes (e.g., food intake, medication, physical activity).
Step 8: Dispose of Used Materials Safely
Dispose of the used lancet in a sharps container. Discard the test strip as directed. Do not reuse lancets or strips. Clean the lancing device and meter regularly based on the manufacturer’s instructions.
Interpreting Your Blood Sugar Results
Knowing your target range is important. General guidelines are:
Before meals: 80–130 mg/dL (4.4–7.2 mmol/L)
Two hours after meals: Less than 180 mg/dL (10.0 mmol/L)
Your doctor may set different goals based on your health and age. If your results are consistently too high or too low, contact your healthcare provider.
Common Mistakes and How to Avoid Them
1. Not Washing Hands
Food or lotion on your fingers can interfere with the reading. Always wash and dry your hands before testing.
2. Using Expired Test Strips
Expired strips can give false results. Check the date before using.
3. Reusing Lancets
Used lancets can cause infection and pain. Use a new lancet for every test.
4. Squeezing the Finger Too Hard
This can mix tissue fluid with blood and affect accuracy. If blood doesn’t come easily, warm your hand or shake it downward to increase flow.
5. Incorrect Storage
Keep strips in their original container. Store the kit at room temperature, away from moisture and sunlight.
Understanding Patterns and Making Adjustments
Tracking your readings helps identify patterns. For example, consistently high readings after breakfast may suggest you need to adjust your diabetic diet. Logging your readings helps your doctor make treatment decisions. Use apps or paper logs to track the time of test, results, food intake, and any symptoms.
Using Continuous Glucose Monitors (CGMs)
While traditional test kits use fingersticks, some people use continuous glucose monitors. These devices use a sensor placed under the skin to provide real-time glucose readings. However, they do not replace fingerstick testing in all cases. You still need a meter to confirm readings or calibrate the sensor. CGMs are helpful for those with frequent glucose fluctuations or hypoglycemia unawareness.
What to Do If Your Blood Sugar Is Too High or Too Low
High Blood Sugar (Hyperglycemia)
Symptoms may include thirst, dry mouth, blurry vision, and fatigue. Causes include eating too much, missing insulin, or stress. Drink water, exercise (if advised), and contact your doctor if levels stay high.
Low Blood Sugar (Hypoglycemia)
Symptoms include shakiness, sweating, confusion, and dizziness. Eat 15 grams of fast-acting carbs like juice or glucose tablets. Recheck in 15 minutes. Repeat if needed. Seek help if symptoms persist.
Maintaining Your Equipment
Clean your meter weekly or as recommended. Replace batteries when needed. Check the display for clarity. Keep your supplies in a clean, dry place. Do not expose your meter or strips to heat or cold. Always carry extra supplies when traveling.
Travel Tips for Blood Sugar Testing
- Pack extra test strips and lancets
- Carry backup batteries for your meter
- Use a small cooler bag if needed for temperature control
- Keep your testing kit in your carry-on, not checked luggage
Testing while traveling helps you avoid unexpected highs or lows. Continue testing on your usual schedule and adjust for time zones if necessary.
Educating Family and Caregivers
Family members and caregivers should understand how to use the kit and recognize signs of blood sugar changes. Teach them how to help during a hypoglycemic episode. Let them know where your testing supplies are kept and how to assist with logging results if needed.
Benefits of Consistent Testing
Consistent blood sugar testing offers many benefits:
- Helps avoid complications
- Informs medication adjustments
- Supports a healthy diabetic diet
- Provides motivation for lifestyle changes
- Reduces anxiety by offering better control
Conclusion:
Using a blood sugar test kit correctly is an important part of diabetes self-care. By learning the proper technique and testing consistently, you can detect changes in blood glucose early and respond quickly. Keep your kit clean, track your results, and talk to your doctor about any patterns you notice. This knowledge empowers you to take better control of your diabetes and overall well-being.
With support, practice, and the right tools, you can make blood sugar monitoring a smooth part of your daily routine. Stay informed, stay prepared, and stay healthy.
Related topics:
How to Read a Blood Sugar Level Test