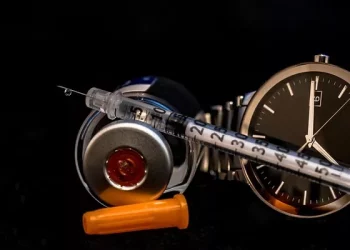
Self blood glucose monitoring (SBGM) is an essential part of managing diabetes. It allows individuals to track their blood sugar levels regularly and adjust their lifestyle, diet, and medications accordingly. This article will guide you through the process of self blood glucose monitoring, explaining its importance, the tools involved, and the best practices for accurate results. By monitoring your blood glucose, you can make informed decisions to better control your diabetes and improve your health.
What is Self Blood Glucose Monitoring?
Self blood glucose monitoring (SBGM) is the process of checking your blood sugar levels at home using a blood glucose meter. This test gives you an immediate result that reflects your blood sugar level at the moment. Regular monitoring is essential for people with diabetes because it helps track how food, physical activity, stress, and medications affect blood sugar levels. By keeping a record of these measurements, individuals can adjust their treatment plans to better manage their condition.
Why is Blood Glucose Monitoring Important?
Blood glucose monitoring plays a crucial role in diabetes management. The main goal of managing diabetes is to maintain blood sugar levels within a target range. By doing so, you can reduce the risk of complications, such as heart disease, kidney damage, and nerve damage, that can arise from poorly controlled blood sugar levels.
Frequent monitoring helps you:
- Understand how your body responds to food, exercise, and medications.
- Adjust your insulin or other medications if needed.
- Detect high or low blood sugar levels early and take appropriate action.
- Keep track of your progress toward your blood sugar goals.
- Make lifestyle adjustments based on your glucose trends.
Tools for Blood Glucose Monitoring
To monitor your blood glucose, you will need a few essential tools:
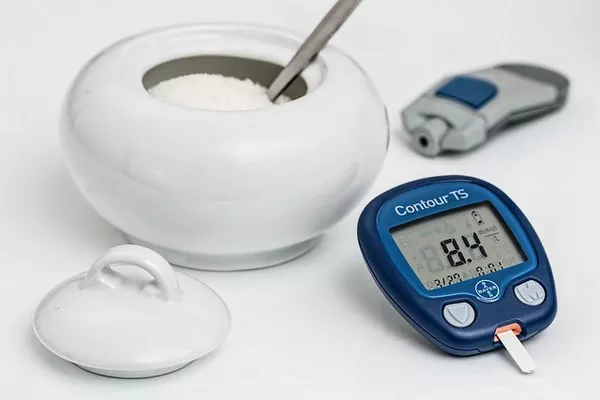
Blood Glucose Meter: This is the main tool used for measuring blood sugar levels. It consists of a small device that reads the blood sample and displays the result. Meters can vary in features, but they all measure blood glucose levels accurately.
Test Strips: These are small strips that you insert into the blood glucose meter. You will place a drop of blood on the test strip, and the meter will use this to determine your glucose level.
Lancing Device: A lancing device is used to prick your finger to draw blood for the test. It is designed to make the process less painful and more precise.
Alcohol Swabs: These are used to clean the area of skin before taking a blood sample. This ensures that the test is hygienic and accurate.
Steps for Self Blood Glucose Monitoring
Below are the steps to properly monitor your blood sugar at home:
Step 1: Prepare Your Equipment
Before starting, gather all the necessary equipment: your blood glucose meter, test strips, lancing device, alcohol swabs, and a clean cotton ball or tissue to stop any bleeding. Make sure your blood glucose meter is clean and properly set up. Replace the test strip with a new one if needed.
Step 2: Clean Your Hands
Wash your hands thoroughly with warm water and soap to remove any dirt or oils that could affect the test. If washing your hands is not possible, use an alcohol swab to clean the area where you will prick your finger.
Step 3: Prepare the Lancing Device
Load the lancing device with a new lancet (a small needle). Adjust the device to the appropriate depth for your skin type. A shallower setting may be more comfortable, especially for those who are new to testing. Choose a spot on the side of your fingertip or a different area approved by your healthcare provider. This will minimize discomfort and reduce the risk of repeated use of the same site.
Step 4: Prick Your Finger
Hold the lancing device firmly against the skin and press the button to release the lancet. You should feel a small prick. If you are concerned about the pain, you can try using a different finger or a different area of your hand, as fingertips tend to have more nerve endings.
Step 5: Apply the Blood Sample to the Test Strip
Gently squeeze your fingertip to get a small drop of blood. Immediately apply the drop of blood to the edge of the test strip. The blood will be absorbed by the strip, and the meter will start processing the reading.
Step 6: Wait for the Result
The blood glucose meter will display your blood sugar level within a few seconds. Most meters will show the result on a digital screen. It will be displayed in milligrams per deciliter (mg/dL) or millimoles per liter (mmol/L), depending on your region.
Step 7: Clean the Test Area
After getting the result, use a cotton ball or tissue to gently stop any bleeding. If you used an alcohol swab, ensure the alcohol evaporates completely before testing to avoid affecting the results.
Step 8: Record Your Result
Record your blood glucose reading, the time of day, and any relevant information such as what you ate or how much physical activity you did. Keeping track of your readings helps you identify patterns and understand how different factors affect your blood sugar levels. Consider using a blood sugar monitoring app or journal to keep your records organized.
Step 9: Dispose of the Lancet and Test Strip
Dispose of the lancet and test strip in a proper disposal container, such as a sharps container, to ensure safety and prevent injury.
When Should You Monitor Your Blood Glucose Levels?
How often you should monitor your blood glucose levels depends on several factors, including the type of diabetes you have, your treatment plan, and how well your blood sugar is controlled. Here are some general guidelines:
Type 1 Diabetes: Individuals with type 1 diabetes should monitor their blood sugar levels at least 4-6 times a day. This includes before and after meals, as well as before bedtime.
Type 2 Diabetes: If you are taking insulin, you may need to monitor your blood sugar levels multiple times a day. If you’re managing your diabetes with oral medications or diet alone, you may only need to test once a day or a few times a week.
Pre-diabetes: People with pre-diabetes may be advised to monitor their blood glucose levels occasionally to track any changes and prevent the progression to diabetes.
Interpreting Your Blood Glucose Readings
Understanding your blood glucose readings is vital to managing diabetes. Here are general guidelines for interpreting the results:
Fasting Blood Glucose: A normal fasting blood sugar level is between 70-99 mg/dL (3.9-5.5 mmol/L). A level above 100 mg/dL (5.6 mmol/L) but below 126 mg/dL (7 mmol/L) indicates pre-diabetes. A fasting blood sugar level of 126 mg/dL (7 mmol/L) or higher suggests diabetes.
Post-meal (2 hours after eating) Blood Glucose: A normal post-meal blood sugar level is less than 140 mg/dL (7.8 mmol/L). Levels above this range could indicate issues with blood sugar control.
It is important to note that your target blood glucose range may vary based on your age, health, and treatment goals. Always follow your healthcare provider’s recommendations regarding your target ranges.
Best Practices for Accurate Blood Glucose Monitoring
To ensure accurate blood glucose readings, consider these best practices:
- Use the correct test strips for your meter. Each meter is designed to work with specific strips.
- Make sure the meter is calibrated and working properly.
- Follow the manufacturer’s instructions for your meter and test strips to ensure accurate results.
- Test at the same time each day to track trends and changes in your blood sugar levels.
Conclusion
Self blood glucose monitoring is a critical tool in the management of diabetes. By testing your blood sugar regularly, you can gain insights into how different factors affect your glucose levels and adjust your treatment plan accordingly. Keeping track of your readings and working closely with your healthcare provider will help you achieve better control over your diabetes and prevent complications in the long run.
Related topics:
How to Track Blood Glucose Levels