Monitoring blood glucose levels at home is an essential practice for individuals living with diabetes. Regular testing allows for better management of blood sugar levels, potentially reducing the risk of complications associated with diabetes. Whether you’re newly diagnosed with diabetes or have been living with it for some time, understanding the proper methods and tools for blood glucose monitoring is crucial for maintaining your health.
In this guide, we’ll explore the importance of monitoring blood glucose levels, the different types of monitoring devices, how to use them correctly, and tips for interpreting the results. We will also cover how to create a blood glucose monitoring routine and provide guidance for sharing your readings with your healthcare provider.
Why Blood Glucose Monitoring Is Important
For individuals with diabetes, maintaining stable blood sugar levels is key to preventing both short- and long-term complications. Fluctuating glucose levels can lead to symptoms such as fatigue, excessive thirst, and blurred vision. Over time, consistently high blood sugar can damage organs and lead to complications like nerve damage, kidney disease, and heart disease.
By monitoring blood glucose at home, you can take proactive steps to control your condition. Testing your blood glucose helps you:
Track your blood sugar trends: Regular monitoring helps you recognize patterns in your glucose levels, which can inform adjustments in your diet, exercise, or medication.
Prevent hypoglycemia or hyperglycemia: Monitoring allows you to spot when your blood sugar is too low (hypoglycemia) or too high (hyperglycemia), giving you a chance to take action before symptoms worsen.
Ensure your treatment plan is working: Tracking blood glucose gives you and your healthcare provider insight into whether your treatment plan—whether it involves insulin, oral medications, or lifestyle changes—is effective.
Make informed decisions: By regularly testing your blood glucose, you can make data-driven decisions about what foods to eat, when to take medications, and when to exercise.
Types of Blood Glucose Monitoring Devices
There are two primary ways to monitor blood glucose levels at home: traditional blood glucose meters and continuous glucose monitors (CGMs). Both options have their pros and cons, and the choice depends on your specific needs, preferences, and healthcare provider’s recommendations.
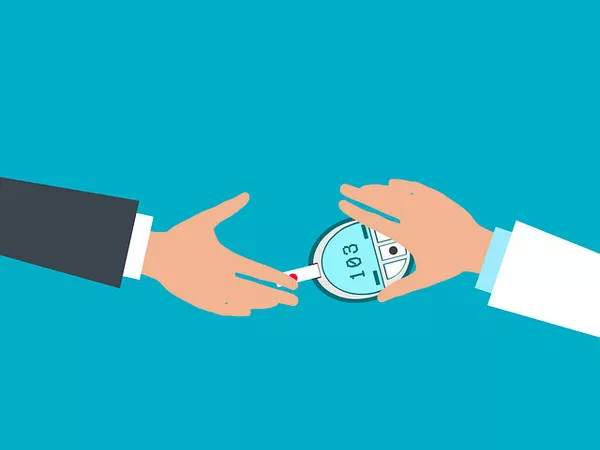
1. Blood Glucose Meters (Glucometers)
Blood glucose meters are the most common and widely available devices for home blood glucose monitoring. They are small, portable, and relatively easy to use. The process typically involves the following steps:
Prepare the meter and test strip: Insert a test strip into the meter. Ensure that the meter is clean and functioning properly.
Prick your finger: Using a lancet device, prick the side of your fingertip to draw a small drop of blood. The lancet is designed to minimize discomfort, and there are options for adjustable depth to suit different skin types.
Apply blood to the strip: Place the blood drop onto the test strip, ensuring that the entire blood sample is absorbed by the strip.
Read the results: Within a few seconds, the meter will provide your blood glucose level on the display screen.
Advantages:
Affordable and easy to use
Provides a quick reading of your blood glucose level
Portable and discreet for testing on the go
Disadvantages:
Requires frequent finger pricks, which can be uncomfortable for some individuals
Only provides a snapshot of blood glucose levels at a particular moment in time, rather than continuous data
2. Continuous Glucose Monitors (CGMs)
A continuous glucose monitor (CGM) provides real-time, continuous data on your blood glucose levels throughout the day and night. The system consists of a small sensor that is placed under the skin, usually on the abdomen or arm. The sensor measures glucose levels in the interstitial fluid (the fluid between cells) and transmits the data to a wearable device, such as a smartphone or receiver.
CGMs are more advanced than traditional meters and offer several advantages:
Continuous monitoring: Unlike blood glucose meters, CGMs provide real-time data on how your glucose levels are changing throughout the day. This helps you identify trends and patterns.
Alerts and alarms: Many CGMs have the capability to alert you if your blood glucose is too high or too low, helping prevent dangerous levels of hypoglycemia or hyperglycemia.
Less frequent finger pricks: While CGMs still require periodic finger-prick calibrations, they reduce the need for frequent blood sampling.
Advantages:
Provides continuous glucose data and trends
Helps track glucose variability, providing a more complete picture of your diabetes management
Reduces the need for frequent finger-pricking
Disadvantages:
More expensive than blood glucose meters
Requires wearing a sensor on your skin, which may not be comfortable for everyone
Sensors may need to be replaced regularly
3. Flash Glucose Monitors (FGMs)
Flash glucose monitors, like Abbott’s Freestyle Libre, are similar to CGMs, but they don’t provide continuous real-time data. Instead, users must scan the sensor with a reader or smartphone to get a glucose reading.
Advantages:
Similar to CGMs in terms of continuous monitoring
No need for regular finger-pricking, but requires scanning to get readings
More affordable than CGMs
Disadvantages:
Doesn’t provide real-time alerts for high or low blood glucose
Requires scanning to get a reading, which may be less convenient than a CGM
How to Use Blood Glucose Meters and CGMs Correctly
Regardless of which device you use, it’s important to follow the correct procedure to ensure accurate readings. Below are the steps for both traditional blood glucose meters and continuous glucose monitors.
1. Using a Blood Glucose Meter
Wash your hands: Clean your hands thoroughly with soap and water before testing. This helps avoid contamination that could skew your results. If soap and water are not available, use alcohol wipes, but ensure that your fingers are dry before testing.
Prepare the meter and test strips: Insert the test strip into the meter, ensuring it’s positioned correctly.
Prick your finger: Use the lancet device to prick the side of your fingertip. It’s important to use the side of the finger rather than the center to minimize discomfort.
Apply the blood to the test strip: Squeeze your finger gently to produce a small drop of blood, then apply it to the test strip. Be sure to apply enough blood to fill the strip’s sample area.
Wait for the results: The meter will display your blood glucose level within a few seconds.
Record the result: Make sure to note the time and any relevant details, such as recent meals or physical activity, which may impact your results.
2. Using a Continuous Glucose Monitor (CGM)
Install the sensor: Your healthcare provider or pharmacist will help you install the sensor under your skin. The sensor typically lasts for several days to a week, depending on the model.
Calibrate the CGM (if required): Some CGMs require you to calibrate them using finger-prick tests, so follow the manufacturer’s instructions.
Monitor readings: The CGM will continuously measure your blood glucose levels and provide data to your smartphone or receiver. Some CGMs offer alerts when your levels fall outside of a set range.
Replace the sensor: After the recommended time period, the sensor will need to be replaced. Make sure to follow the manufacturer’s instructions for replacing the sensor.
Tips for Effective Blood Glucose Monitoring
To get the most accurate and helpful results from your blood glucose monitoring, follow these tips:
Test at consistent times: Test at specific times each day, such as before meals, after meals, and before bed. This allows you to track your glucose levels in response to different activities and foods.
Keep a log of your results: Whether you use a traditional meter or a CGM, keeping a record of your blood glucose readings is vital. Include notes about what you ate, your physical activity, and any medications taken.
Be aware of factors that affect blood glucose: Certain factors can influence your blood glucose readings, including stress, illness, and changes in physical activity. Understanding how these factors impact your readings can help you make more informed decisions.
Consult your healthcare provider regularly: Share your monitoring results with your doctor during your check-ups. This will help them make adjustments to your treatment plan if needed.
Know when to test more frequently: If you’re experiencing symptoms of low or high blood sugar, or if you’ve made a change to your medication or diet, you may need to test more frequently.
How to Interpret Blood Glucose Readings
Understanding your blood glucose readings is key to managing your diabetes. Your healthcare provider will guide you on what constitutes a normal range for you, but general guidelines are as follows:
Before meals (Fasting): 70 to 130 mg/dL (3.9 to 7.2 mmol/L)
2 hours after meals (Postprandial): Less than 180 mg/dL (10.0 mmol/L)
Bedtime: 90 to 150 mg/dL (5.0 to 8.3 mmol/L)
Keep in mind that individual targets may vary, and your doctor will help you set the optimal range for your condition.
Creating a Blood Glucose Monitoring Routine
Establishing a consistent routine for monitoring your blood glucose is vital for effective diabetes management. Here’s how you can create a personalized routine:
Consult with your doctor: Your healthcare provider will help you determine the appropriate times and frequency to check your blood glucose levels based on your treatment plan.
Set reminders: It can be helpful to set alarms or reminders to ensure that you check your blood glucose at the right times each day.
Track your results: Keep a detailed log of your readings, including the time of day, food, exercise, and medication. Many people find it helpful to use an app to track their data.
Review your data regularly: Look for patterns or trends in your readings. If you notice fluctuations or consistently high or low readings, discuss them with your healthcare provider.
Conclusion
Regular blood glucose monitoring is essential for managing diabetes and preventing complications. By using blood glucose meters or continuous glucose monitors, you can track your glucose levels, understand how they change throughout the day, and make necessary adjustments to your diet, exercise, or medication. Monitoring at home empowers you to take control of your health, and with the right tools and routine, you can improve your overall well-being and quality of life.
Related topics:
What Range is Considered Low Blood Sugar